TM 1-1520-238-23
13-24
Change 1
13.7.
ENCU ELECTRICAL CONTROL VALVE REMOVAL/INSTALLATION - continued
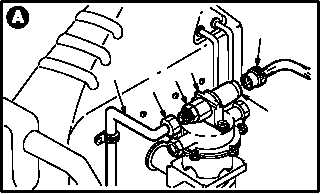
13.7.3. Removal
a. Detach connector P287 (1) from receptacle
(L39)J1 (2).
b. Remove tube (3) from ENCU electrical control
valve (4).
(1) Hold nipple (5). Remove nut (6).
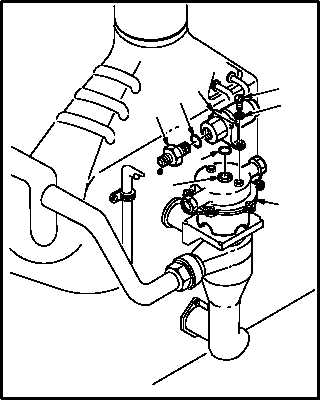
c. Remove electrical valve (4) from ENCU tem-
perature control shutoff valve (7).
(1) Remove two screws (8) and washers (9).
(2) Remove electrical valve (4).
(3) Remove and discard packing (10) from port
(11) in shutoff valve (7).
NOTE
If replacing electrical valve, go to step d.
If reinstalling valve, go to paragraph
13.7.4.
d. Remove nipple (5) from electrical valve (4).
(1) Hold electrical valve (4). Remove nipple (5).
(2) Remove and discard packing (12).
13.7.4. Cleaning
a. Wipe removed and attaching parts with a
clean rag.
13.7.5. Inspection
a. Check nipple and screws for cracks, nicks,
and stripped or damaged threads (para 13.1).
b. Check removed and attaching parts for corro-
sion (para 1.49).
c. Check for cracked or dented body. None al-
lowed.
d. Check for damaged connector threads. None
allowed.
e. Check for cracks, corrosion, and broken,
bent, or damaged pins (TM 55-1500-323-24).
GO TO NEXT PAGE
M04-3740-2
3
6
5
4
1
2
M04-3740-3
10
11
7
8
9
5
12
4