
TB 1-1520-251-20-13
9.51
Repeat the hand tightening sequence a few times until none of the twelve screws are loose.
9.52
Gently loosen the fixture latch.
9.53
Remove the shim tab.
9.54
Tighten the fixture latch.
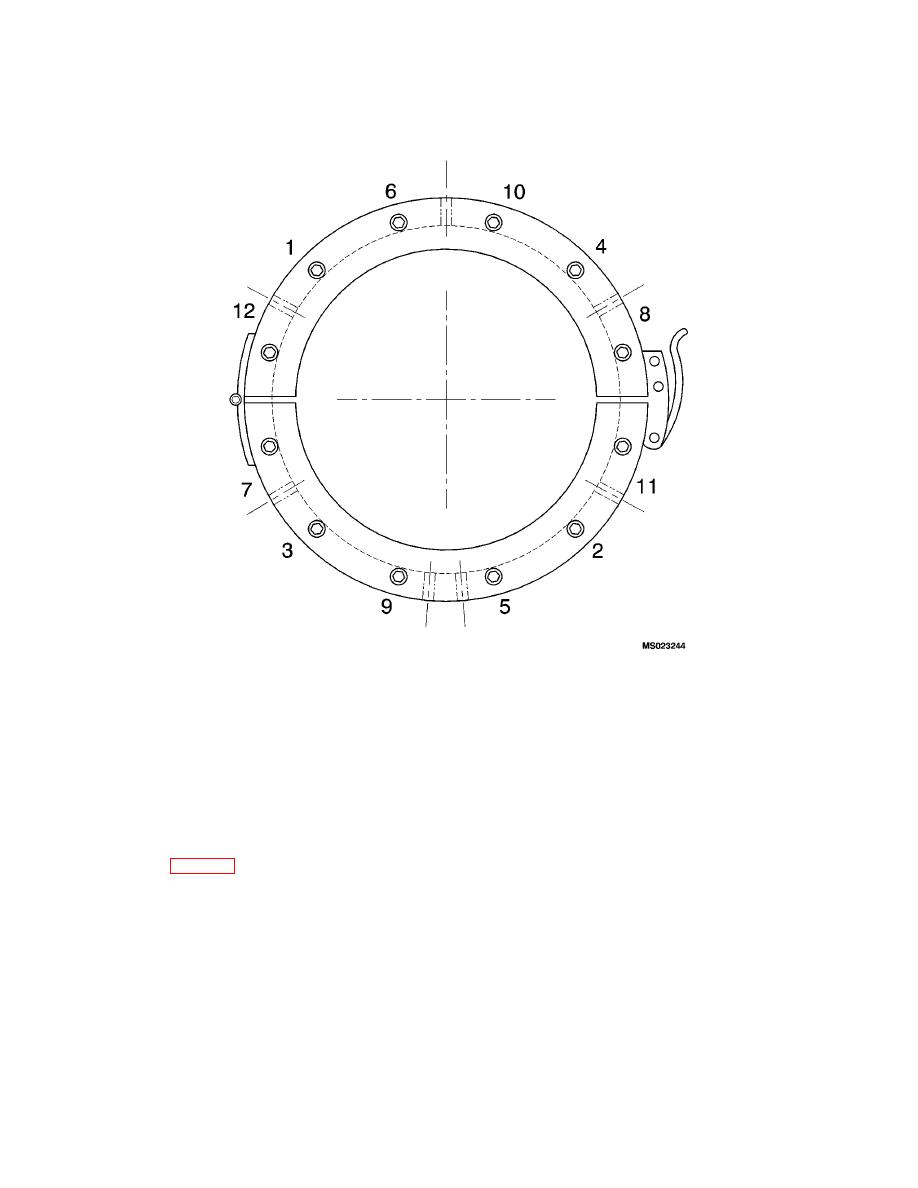
9.55 Tighten the lower clamp plate holding screws with the hex wrench in the same sequence as in step
9.50. See Figure 5.
CAUTION
Only a gentle torque is required.
9.56
Repeat the tightening procedure until no screw is loose.
9.57
Make sure that the fixture top lip is in contact with the flange top face.
9.58
Look at the flange ring through the ring split view hole to make sure of the split position.
CAUTION
If the ring is not in the proper position, remove the fixture and repeat
steps 9.44 through 9.58. The adhesive should still be workable.
10
