TM 1-1520-238-23
11-737
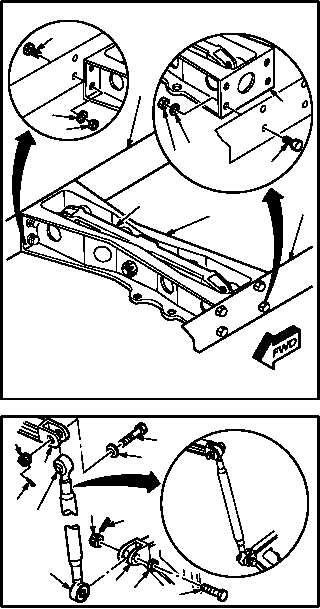
11.167. DIRECTIONAL F.S. 159.98 BELLCRANK AND BRACKET REMOVAL/INSTALLATION – continued
b. Install bracket (13) and bellcrank (4) on air-
frame (49) and (50).
(1) Aline bracket (13) with airframe (50).
(2) Install four bolts (53) through airframe (50)
and bracket (13).
(3) Install four washers (52) and nuts (51) on
bolts (53).
(4) Install three bolts (53) through airframe (49)
and bracket (13).
(5) Install three washers (52) and nuts (51) on
bolts (53).
c. Install rod ends (37) and (38) on bellcranks
(39) and (40). Torque nuts (43) and (44) 30 to 40
INCH-POUNDS.
(1) Aline rod end (37) with bellcrank (39).
(2) Install bolt (45) through washer (46), bell-
crank (39), and rod end (37).
(3) Aline rod end (38) with bellcrank (40).
(4) Install bolt (47) through washer (48), bell-
crank (40), and rod end (38).
(5) Check fit of self-retaining bolts (45) and (47)
(para 11.1).
(6) Install nuts (43) and (44). Torque nuts (43)
and (44) to 30 INCH-POUNDS. Use torque
wrench
(7) Increase torque to aline cotter pin hole, but do
not exceed 40 INCH-POUNDS.
(8) Install new cotter pins (41) and (42).
GO TO NEXT PAGE
52
M04-3392-5
53
51
49
5152
53
4
13
50
13
M04-3392-12
43
41
37
39
45
46
44
42
38
4048
47