TM 1-1520-238-23
Change 4
11-121
11.19.
TORQUE LINK REMOVAL/INSTALLATION – continued
11.19.6. Installation
NOTE
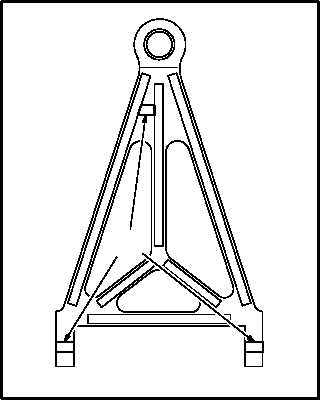
When installing torque link, ensure tool-
ing bosses are facing outboard.
a. Install link (1) on swashplate (18). Torque bolt
(21) 75 to 91 FOOT-POUNDS.
(1) Aline link (1) with swashplate (18).
(2) Install bushing (23) in swashplate (18).
(3) Position nut (20).
CAUTION
Threads of bolt and nut shall be clean,
and compound free. Contaminated
threads can cause improper torque,
which may cause damage to flight control
system.
(4) Apply a light coat of corrosion preventive
compound to shank of bolt (21). Use
corrosion preventive compound (item 62A,
App F).
(5) Install bolt (21) through washer(s) (22) (if re-
quired), bushing (23), swashplate (18), and
link (1).
(6) Check fit of self-retaining bolt (21) (para
11.1).
(7) Hold bolt (21). Install nut (20). Use open end
wrench and socket.
(8) Torque bolt (21) to 75 FOOT-POUNDS. Use
torque wrench and socket.
(9) Increase torque to aline cotter pin hole, but do
not exceed 91 FOOT-POUNDS.
(10) Install new cotter pin (19).
(11) Apply sealing compound around bolt (21)
head, washer (22), and nut (20). Use sealing
compound (item 176, App F).
GO TO NEXT PAGE
18
20
19
1
23
22
21
M04-1717-5A
VIEW ROTATED
M04-1717-8
TOOLIN
G
BOSS