TM 1-1520-238-23
16-68
Change 8
16.14.
PYLON AERIAL BRACKET REMOVAL/INSTALLATION - continued
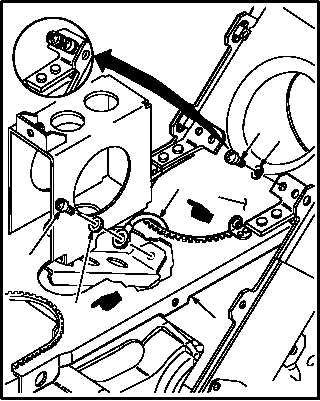
e. Remove bracket (4) from pylon frame (15).
(1) Remove four screws (16) and washers (17).
(2) Remove screw (18), washer (19), and lead
(20).
(3) Remove bracket (4).
16.14.4. Cleaning
a. Wipe bracket with a clean rag.
16.14.5. Inspection
a. Check connector for cracks, broken pins, or
damaged wiring connections (para 16.1).
b. Check circuit card for broken wires, connec-
tors, or clamps (TM 55-1500-323-24).
c. Check bracket for cracks (para 16.1).
d. Check fasteners for damage (para 16.1).
e. Check bracket for corrosion (para 1.49).
16.14.6. Installation
a. Install bracket (4) on frame (15).
(1) Position bracket (4) on frame (15). Aline
screw holes.
(2) Install four screws (16) and washers (17).
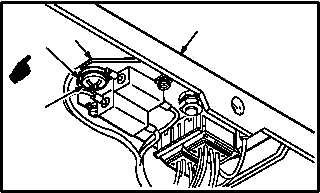
b. Install card (12) on bracket (4).
(1) Position card (12) on bottom of bracket (4).
Aline screw holes.
(2) Install two screws (13) and washers (14).
GO TO NEXT PAGE
19
4
15
1617
M04-2712-6A
20
18
M04-2712-8A
4
12
14
13