TM 1-1520-238-23
16-72
Change 8
16.15.
PYLON CONTROLLER AND CONTROLLER BRACKET REMOVAL/INSTALLATION - continued
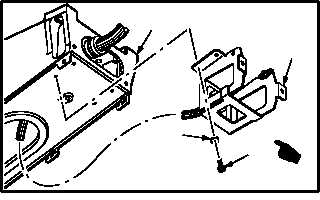
b. Remove bracket (2) from pylon frame (4).
(1) Remove four cap screws (5) and washers (6).
(2) Remove bracket (2).
WARNING
Maintain pressure on preloaded
spring while removing retaining ring.
A spring-loaded mechanism can
cause injury to personnel if released
in an uncontrolled manner. Always
take care while working with the
mechanism.
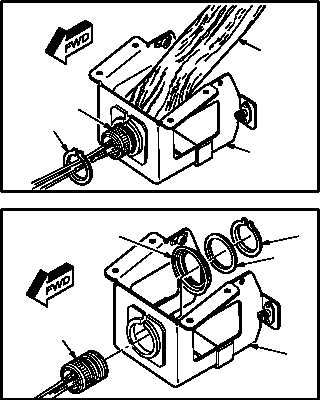
c. Detach connector P506 (8) from bracket (2).
(1) Apply pressure to aft side of connector (8).
Use handle of hammer (9) (similar object may
be used if made of wood) to decrease tension
on retainer ring (10). Remove retainer ring
(10) from forward side of connector (8). Use
retaining ring pliers.
(2) Slowly reduce pressure on connector (8).
(3) Remove retainer ring (11) from aft side of
connector (8). Use retaining ring pliers.
(4) Remove washer (12) and spring (13) from
connector (8).
(5) Detach connector (8) from bracket (2).
16.15.4. Cleaning
a. Wipe controller, bracket, and attachment area
with a clean rag.
GO TO NEXT PAGE
M04-2762-4A
VIEW LOOKING UP
2
5
6
4
M04-2762-8
10
8
2
9
M04-2762-3
11
12
2
13
8